

David's
<Tech Repair\>
Your friendly neighborhood IT Guy
davidstechsupport
🖥️I built a home server🖥️
This is a project I have been wanting to do for a while, but I never had all the parts or the money until now. Luckily, I just needed a CPU fan and RAM for this since I already had everything else collecting dust. As of this blog, I only have a single 8 TB drive for the server to start (and a drive specifically for the operating system), but I plan on getting more in the future.
Here is what I have for my server with links:
-
Rufus - Bootable drive software
-
500 GB hard drive (for the operating system)
-
Basic keyboard
Here are the sections for this page:
-
What is a home server?
-
Pros and Cons
-
Software Setup
-
Mounting Process
-
The Finished Product
-
Closing notes
Also, here is a copy of the Proxmox handbook that will teach you everything about getting started with a server and more.
What is a home server?
A home server is a computer that is dedicated to hosting files on the connected network for everything from file sharing to running applications and services.
This allows you to access and manage your data without the need for third-party cloud software like Google Drive.

Another device that is similar to a home server is:
-
Network Attached Storage (NAS) device is like having your own personal cloud storage right in your home or business. Instead of saving important files to just one computer or relying on monthly cloud subscriptions, a NAS stores your documents, photos, videos, and other files in one central location that can be securely accessed from multiple devices on your network. It's a great solution for backing up important data, sharing files between family members or coworkers, and keeping your information organized and easily accessible whenever you need it.

Pros and Cons
Pros:
-
Personal Cloud Storage (NAS): Consolidate backups of all the laptops, desktops, and phones in your household in one physical location.
-
Media Streaming: Host and stream your personal video and audio library across all your home devices using software like Plex or Jellyfin. Basically, as long as you have the content for the server, you can have a personal free Netflix
-
Home Automation: Manage local smart home platforms like Home Assistant to control lights, security, and thermostats with complete privacy.
-
Ad Blocking: Run network-wide ad-blocking software like Pi-hole to strip advertisements from all devices connected to your Wi-Fi.
-
Game Servers: Host dedicated multiplayer servers for games like Minecraft, enabling you to play with friends on your own terms.
Cons:
-
Overall Costs: Building or buying a server, purchasing drives, and getting uninterrupted power supplies (UPS) require a significant initial investment. Not to mention the more powerful you want the server, the more it will cost
-
Electricity & Space: Servers run 24/7, which will increase your monthly power bill. They also take up physical space and can generate noise and heat.
-
Security Responsibility: This is only a con if you plan on allowing open access to your server
-
Maintenance & Backups: Planning and having the money set aside to replace faulty hardware and upgrades
-
Time Commitment: Setting up the server itself and anything you may add to it.
Motherboard Assembly
The assembly process is pretty much the same as building a computer, except for this instance, there's no chassis that everything gets placed into. I have listed the parts at the top of this page if you would like to check them out, but here's the before and after assembly:
Now, this was just to get it to work for the software setup; the mounting process is a later step


The Mounting Process
This process was easier than I expected; the steps were as follows:
-
Make the screw points for the motherboard and components
-
Make the points for the fans
-
Make the screw points for the wall mounting
Overall, it took about 20 minutes for this, just due to placing the standoffs, making room on the wall, and hiding the cables
Wallboard

Placement sketches

Motherboard Standoffs

Exhaust fan hole

Hard drives mounted


Software Setup
There are only two bits of software that went into this: Rufus and Proxmox.
Rufus is used to dedicate USB drives to install operating systems
Proxmox is a server Operating system
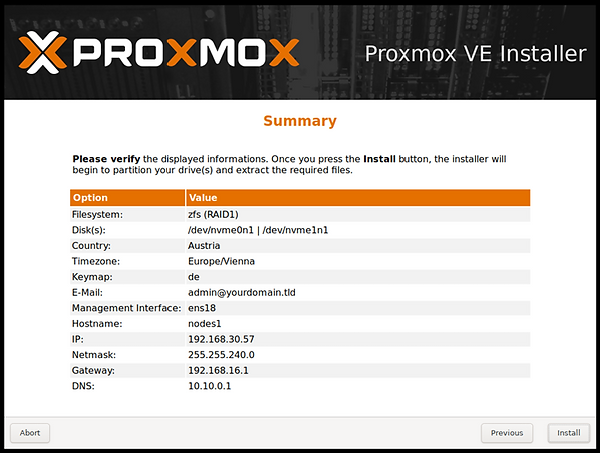
Since the Proxmox setup requires personal network and IP information, I will not show any images of that.
Step 1.) Setting up the USB for Proxmox
This is easy; I just needed to connect my drive to my computer, boot up Rufus, load the Proxmox ISO file, and hit START. Unfortunately (depending on your thoughts on it), running Proxmox directly from the USB instead of a hard drive/SSD is not recommended due to the USB getting worn down pretty fast due to constant reading and writing from Proxmox
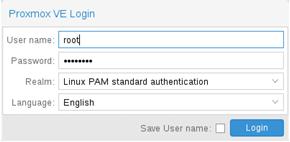
Step 2.) Setting up Proxmox
This is actually easier than expected, I did run into an issue where I could not for the life of me get the IP address to work and it turned out all Ineeded to do was connect the motherboard to the internet with an ethernet cable



The Finished Product
That's all there is to it for a (starter) home server. At the time this page was published, I only have 8 TB of storage for the server. Here is the final result:
I used 4 bolts to secure the server board to the wallboard. I may change it to a method that would allow for easy removal from the wall in the event I need to work on the server, but for now, its a fixed set.
Now that the home server is complete, I can access my files from anywhere without the need for Google Drive and OneDrive.
Some plans/ideas I have for future improvements:
Upgrading to a cabinet that mounts on the wall or stands on the floor/a shelf
-Increasing storage
- Installing RISE on it to have more power as a digital assistant
- Adding control for my smart devices (this would also give RISE control)
- Possibly adding space for public access to my tech repair guides and tools

Closing Notes
That'll do it for this project. Thank you for taking the time to check it out and let me know if you decide to start your own or already have one.
If you would like to know more about the server or setting up software and programs on it, let me know, and I'll write a guide for it.